Installation instructions are considered to be a part of the UL Listing.

Status
Not open for further replies.

LJSMITH1

Senior Member
Location
Stratford, CT
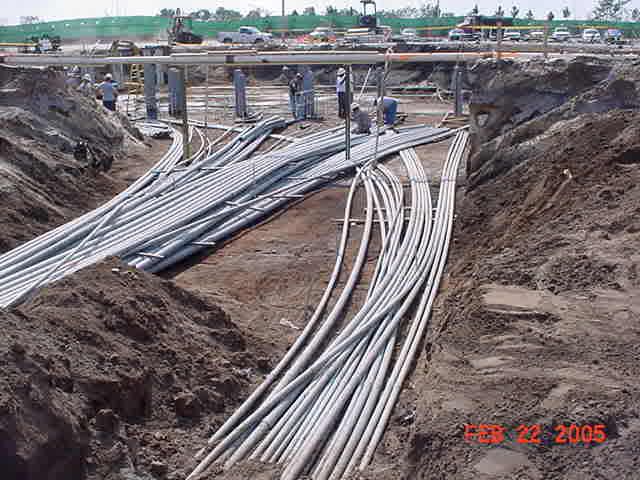
Well you really need to work in the field to know what your suggesting you cant use it on duct banks and thats not electrical conduit thats sewer pipe which we see everyday installed by the plumbing & mechcanical contractors which they never use because its a joke .

Yes weve seen that tool no one ever uses it . plus on 24 " it would need to be used with a crane to move it around .

They use a track hoe and two men to push that kinda pipe together its easyer ill get a picture of a install at work today for you have you ever seen 18 " or 24 " sewer pipe installed its heavy held up by a track hoe with a strap then two men line it up and the track hoe pushes the pipe together easy .

Plus they apply a grease to the seal before they connect it then it slides in

We dont beat a conduit like i said we tap it in with the side of a sledge hammer like puttin a golf ball its kinda easy . We tap it together like one or two feather taps.

Ohm, I know exactly what kind of pipe is pictured with the tool, and I also know how sewer pipe goes together (which is where I first saw this tool being used) :roll: This has nothing to do with the basic principle of the tool. The guys I saw using it, swore by it, especially for the 6" and 8" pipe. They were laying 100'+ a day, with little issue. The traditional method would be to sink a prybar into the ground and lever the end of the pipe. This took at least two or three guys, and occasionally was stubborn.

I also know that duct banks are cramped, but perhaps a slightly different sequence of assembly might provide enough room for such a tool. I don't see any reason why this tool couldn't be adapted to 4" - 6" diameter conduit runs (as long as you have space to use it).

This kind of tool could easily be adapted for PVC electrical conduit with modification, or the company may already offer one. :confused:

I just thought it would be a good suggestion if it could be utilized.:cool: I also don't know if anyone else ever had the same idea and actually tried it.
 

don_resqcapt19

Moderator
Staff member
Location
Illinois
Occupation
retired electrician
If that was a scam, we certainly didn't hear about it. :cool: All I know is we had to scramble to redesign our RT compression fittings to meet the 'revised' UL514B requirement. Even though we were first on the market with a new & patented design, there were others that came soon after. I still don't know who tipped-off UL that there was an issue with ALL manufacturer's RT compression fittings (and probably never will find out..:-?). ...
My point about the "scam" is that the rule only applies to EMT. Why is it safe to have the rigid couplings leak water and have the EMT couplings required to not leak water? Apparently there is no real safety justification for the UL standard. If there was it would apply to both kinds of couplings.
 

LJSMITH1

Senior Member
Location
Stratford, CT
My point about the "scam" is that the rule only applies to EMT. Why is it safe to have the rigid couplings leak water and have the EMT couplings required to not leak water? Apparently there is no real safety justification for the UL standard. If there was it would apply to both kinds of couplings.

Don, I couldn't agree more. Maybe the primary concern was that the EMT may rust inside out faster due to its thinner wall cross section. To keep moisture out of the ID was determined to be more important than in the thicker-walled Rigid or Intermediate conduit.:confused:

There certainly should be a uniform application of this requirement across all types of fittings used outdoors.
 

Cold Fusion

Senior Member
Location
way north
...About the tool to put conduit together it would be easy to make one but not of any use with multiple layers after you reach the top of the bank how would you get to the bottom row ?
...
That statement/question puzzles me. As I recall, we always put the bottom layer in first. Then installed the next upper layer. I don't ever recall ever having to go back to install a lower layer after the upper layers were in.

Do you guys use a different method?

cf
 

ohmhead

Senior Member
Location
ORLANDO FLA
That statement/question puzzles me. As I recall, we always put the bottom layer in first. Then installed the next upper layer. I don't ever recall ever having to go back to install a lower layer after the upper layers were in.

Do you guys use a different method?

cf
Well we start at the bottom also take a look at my pictures posted how are you going to install that tool after your 7 or 8 rows high and all the bells are flush top to bottom theres no space between conduits look at the spacers there not giving you work space for that tool and its a waste of time electricians dont need that tool its a joke .

Iam telling you this take my word for it It will be a labor waste of time on a single row just one run and you dont need it .

Think about when we have a duct bank with different sizes like 3 " 2 1/2" 5 " 2 " 1 1/2 " and say 50 conduits of other sizes in rows stack how are you going to use that tool come get in the real world of doing electrical work sorry people i think you guys have to come on out in one of our duct banks .
 

ohmhead

Senior Member
Location
ORLANDO FLA
Ohm, I know exactly what kind of pipe is pictured with the tool, and I also know how sewer pipe goes together (which is where I first saw this tool being used) :roll: This has nothing to do with the basic principle of the tool. The guys I saw using it, swore by it, especially for the 6" and 8" pipe. They were laying 100'+ a day, with little issue. The traditional method would be to sink a prybar into the ground and lever the end of the pipe. This took at least two or three guys, and occasionally was stubborn.

I also know that duct banks are cramped, but perhaps a slightly different sequence of assembly might provide enough room for such a tool. I don't see any reason why this tool couldn't be adapted to 4" - 6" diameter conduit runs (as long as you have space to use it).

This kind of tool could easily be adapted for PVC electrical conduit with modification, or the company may already offer one. :confused:

I just thought it would be a good suggestion if it could be utilized.:cool: I also don't know if anyone else ever had the same idea and actually tried it.

Well in a duct bank you dont have the space and its time labor and electricians would be wasting there time as its not that hard to tap it together also were using in some cases different sizes its just not cost effective to use we would need 2 inch thur 6 inch the space between is not going to be always a perfect space heres another example of our work its tight elevations will change a direction will be a issue on bends in rows things are not just a simple line of one or two rows .

2-22-05part11cc-19.jpg
In some cases you just dont have that space when you enter a electrical room its not a perfect world were talking hundreds of conduits this room had 5x 5000 amp mains 4 section switchboards and 280 conduits that go in different sections .
 
Last edited:

ohmhead

Senior Member
Location
ORLANDO FLA
Ohm, I know exactly what kind of pipe is pictured with the tool, and I also know how sewer pipe goes together (which is where I first saw this tool being used) :roll: This has nothing to do with the basic principle of the tool. The guys I saw using it, swore by it, especially for the 6" and 8" pipe. They were laying 100'+ a day, with little issue. The traditional method would be to sink a prybar into the ground and lever the end of the pipe. This took at least two or three guys, and occasionally was stubborn.

I also know that duct banks are cramped, but perhaps a slightly different sequence of assembly might provide enough room for such a tool. I don't see any reason why this tool couldn't be adapted to 4" - 6" diameter conduit runs (as long as you have space to use it).

This kind of tool could easily be adapted for PVC electrical conduit with modification, or the company may already offer one. :confused:

I just thought it would be a good suggestion if it could be utilized.:cool: I also don't know if anyone else ever had the same idea and actually tried it.

Well in a duct bank you dont have the space and its time labor and electricians would be wating there time as its not that hard to tap it together also were using in some cases different sizes it just not cost effective to use we would need 2 inch thur 6 inch the space between is not going to be always a perfect space heres another example of our work

2-22-05part11cc-19.jpg
In some cases you just dont have that space when you enter a electrical room it not a perfect world were talking hundreds of conduits this room had 4 x 5000 amp mains 4 section switch boards
 
Last edited:

ohmhead

Senior Member
Location
ORLANDO FLA
Well heres the mains 5 x 5000 amp 4 sections each you cant space it you make it happen
2-17-051cc-19part2-1.jpg


Layers of diffent conduits going to diffent sections theres 280 feeders in this room its 20 feet deep and the room is 70 foot long by 50 foot wide and thats just the feeders not including the branch.

We kinda do this everyday most of our work is commercial and industrial and its months of conduit running it takes 6 to 8 months to do just our underground work on site and then we set gear and heat her up lots of fun .
 
Last edited:
Status
Not open for further replies.
Top